Help Center
Getting started
ExpertRec upgrades your search to a whole new level right out of the box. Here’s how you can get started with the set up all the way up to advanced customization and beyond!
Step 1: Sign up
Signin up for the service does not require you to enter any credit card information but is a compulsory step in setting up your search. Sign up using your Google account and enter the URL to of your domain.
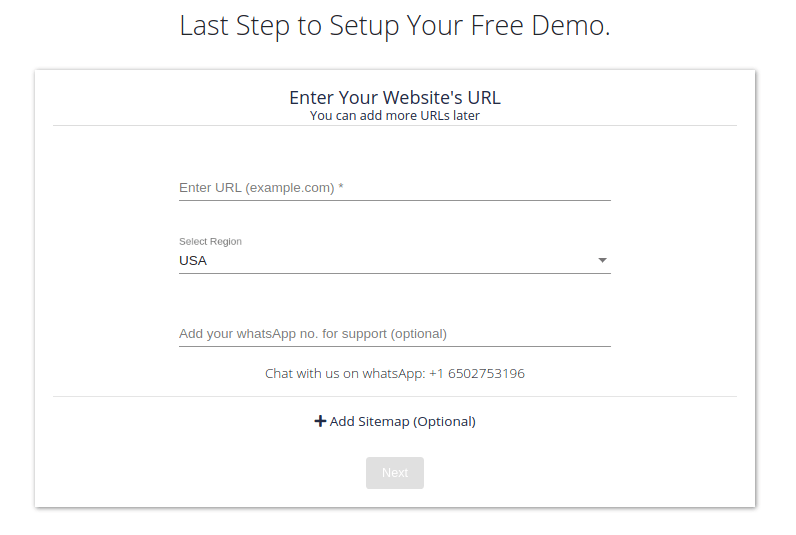
You can optionally enter your number for phone support and/or a sitemap. The sitemap helps in content discovery, but is also a way to limit the pages that appear in the search.
Once you press next our crawlers will follow the domain and build the search index. This might take a few minutes depending on the size of your website. This is will also start your 14-day free trail where you can test out all the features of the search without any restrictions. This search will be limited to 10000 pages but for most uses cases, this is quite sufficient. If you want to search multiple websites at the same time, then you can add more URLs later.
Common pitfalls
- If your URL has a subpath by default (example.com/subpath/) then this will be applied as a filter by default. If all your pages are not part of that subpath, then the search may miss out on some pages. This can be changed in the filters section of the dashboard.
- If you don’t specify https:// in the URL field, by default http:// is added. If you don’t have redirects set up properly, this can cause the crawl to fail
- If your site is not live, blocks spiders, or has restricted access, then you should consider one of the various authentication methods that we support. Without this, the crawl will fail.
- Robots blocking, meta robots tags, etc can cause the crawl to fail. If you have set this up and want the crawler to ignore those settings then you can do so here.
Step 2: Check the demo
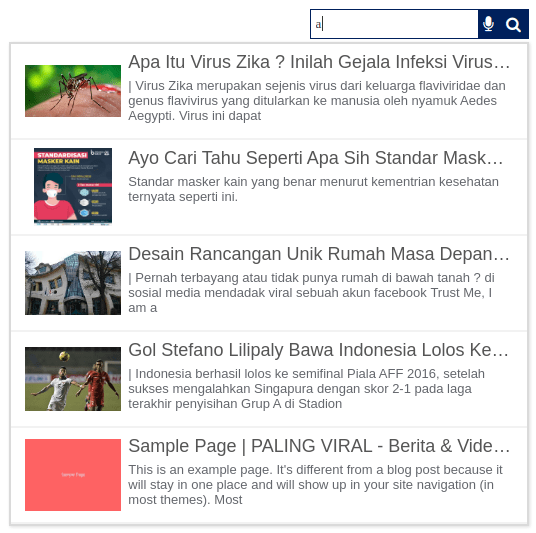
You land on the dashboard where will have to wait for the crawl to complete. You can also close the dashboard and wait for our email letting you know that the crawl is done, but this is not needed unless your site is huge. Once the crawl completes (or has crawled sufficient pages) you can check the demo from the homepage of your dashboard. You can then make sample queries to get a feel of the search UI and the relevance. For most cases the default settings are sufficient and can be taken live with minimal to no changes.
Step 3: Add code to your site
Did you know that you can add the search engine to your site during the trial period? This enables you to see the search in action on your site and evaluate how your audience interacts with it. The analytics data that gets built up from the live version can provide a lot of insights into how useful the search bar will be in improving your critical metrics.
Installing the search on your site is very simple. You can read the installation doc for a detailed explanation or CMS-specific instructions.

The first thing that you need to add is the JS code. This code is what will drive the search and should be added on all pages where you want the search to be available. It is generally a good practice to add this to the <head> tag, right at the beginning.
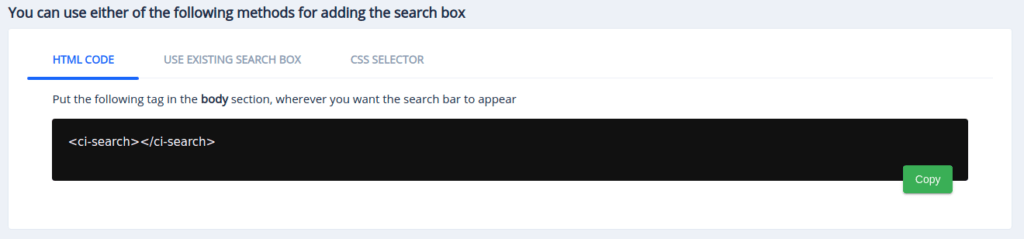
Following this, you need to add the <ci-search> tag. This tag gets rendered into the search box, so place it wherever you want the search box to appear. Using this will let you customize the appearance of the search box, but if your page already has a search box, then you can opt for the next method.
For users who have a search box on their website, it makes more sense to go with the ‘use existing search box’ install mode. This does not require you to do anything besides enabling this from the control panel. This method uses CSS Selectors to find the search box and for most cases the default selectors are sufficient.
Advanced Settings
Of course, not all users like to take the search to their website as it is out of the box. For them, the dashboard offers control over every aspect of the search. The most common of requirements is UI customization.
UI Customization
By default, the search is designed to blend easily into your webpage. But if you want to tweak the UI then there are multiple ways to do the same.
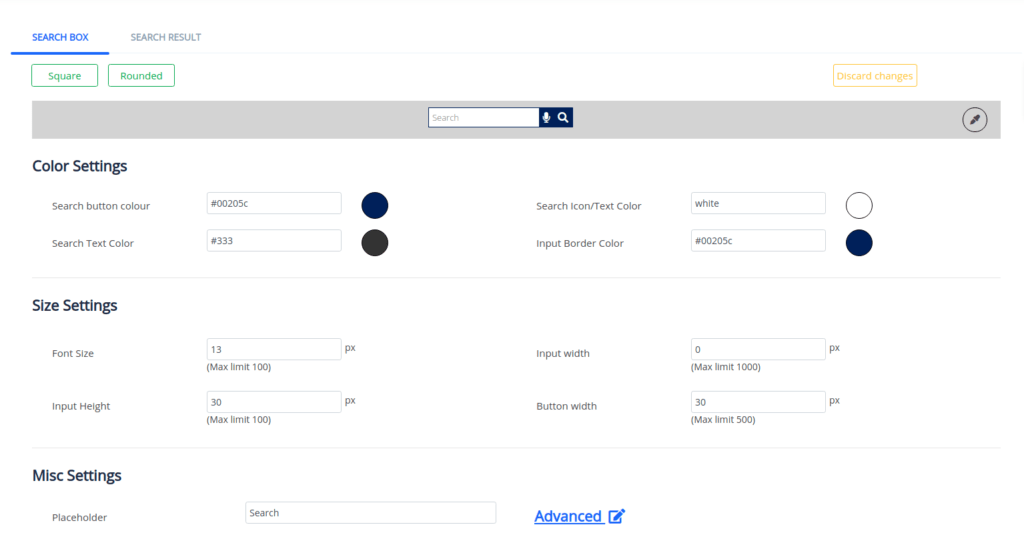
If you are not very tech savvy and wish to do minimal changes, then the basic UI editor is sufficient. You will get a few sliders and input boxes to make changes to the appearance of both the search box and the results page.
If you wish to make a few more advanced changes, then you can move on the advanced editor. Here you will get control over a variety of frequently changed aspects, while still not having to write any code. This also gives you the option of writing custom CSS to get additional control.
Finally, if you prefer to code then you can directly use the Custom CSS Editor and write CSS to style the search box and results.

You can choose to customize specific parts of the search like the pagination, dropdown, facets (including which to show), etc.
Ranking and Relevance
The order in which the search results are shown is decided by search weights. In most cases, the default fields and order is sufficient. You can read more about the list of supported fields in this article. When a query is made, the system tries to match it on parts of a page based on the order specified in the search weights section.
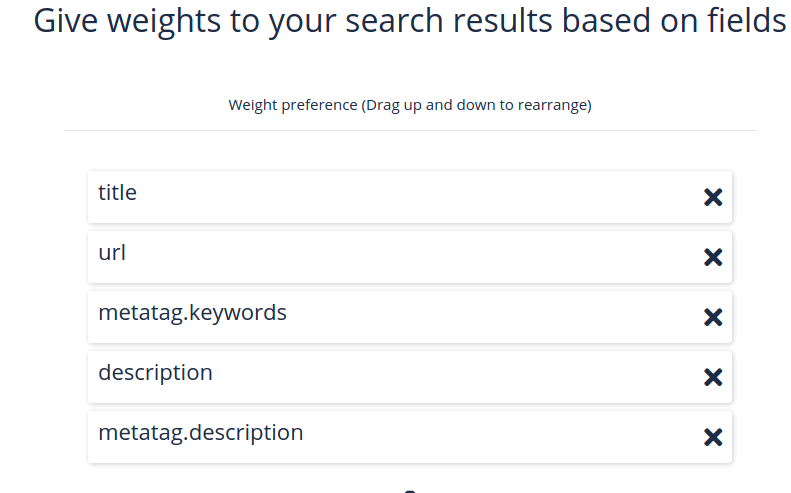 In the above sample, all pages where the query matches the title will be given the most weightage. To get a more detailed understanding of weights, read this article.
One of the most common issue faced is when the search seems to pull up too many results for each query. This may be because the query matches a term that is in the header or footer of all pages. This issue can be easily resolved by removing the content tag from search weights.
Additionally, you can boost results. Here you can choose groups of results which will get promoted in the search and will have a higher likelihood of ranking at the top. For example, you can choose to promote all product pages over content pages.
Control what gets Indexed
Search result quality primarily depends on what pages and documents have been successfully scanned by the crawler and added to your index. If a link hasn’t been indexed – just like with Google search – it won’t show up in the search results. One of the ways to make sure that all pages are discovered is by using a sitemap. You also get the option to restrict the crawl to the sitemap URLs.
The search engine gives you the option to filter out pages based on URL patterns and file types. Common use cases include wanting to remove category pages, excluding PDFs or DOCs from the search, building a search for only one part of the website like /blog.
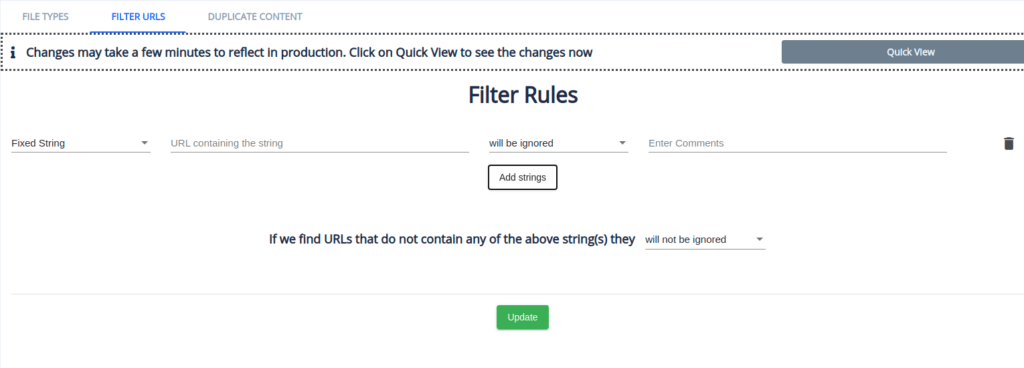
Duplicate content can also be easily removed using the features available like GET parameters or canonical URLs. You can read more about filters here.
Another powerful aspect of the search engine is the ability to pick up any data from a page. This is done using the JS extraction feature. Here you can specify custom javascript that will be run on every page during the crawl. This will pick up any content from the DOM and make it available in the search.
If you face any issues during the setup or feel that the article is missing something, then feel free to contact our support team for assistance.