In this article, we will see how to create an algolia autocomplete.
1. Sign up for an Algolia account
First things first, you’ll need an Algolia account to create our search index.
Follow this link to create your Algolia account!
Algolia offers a completely free account in their Community tier. This is great because you’re able to get full API functionality for development purposes without supplying any payment information.
2. Find your API credentials
After successfully creating your account, click on Go to the dashboard.
Then, click on API Keys in the left-hand column of your dashboard to find your API credentials. You’ll need them in a few minutes! These credentials are sent along with your search requests to tell the Algolia servers which developer account the activity is associated with.
Note: Your Admin API Key is secret! Don’t share it publicly or post it online.

3. Create an Algolia search index
Now you’ll make an index. An index helps search functionality perform at lightning speed. Indices help quickly locate data in large datasets by creating an efficient lookup table.
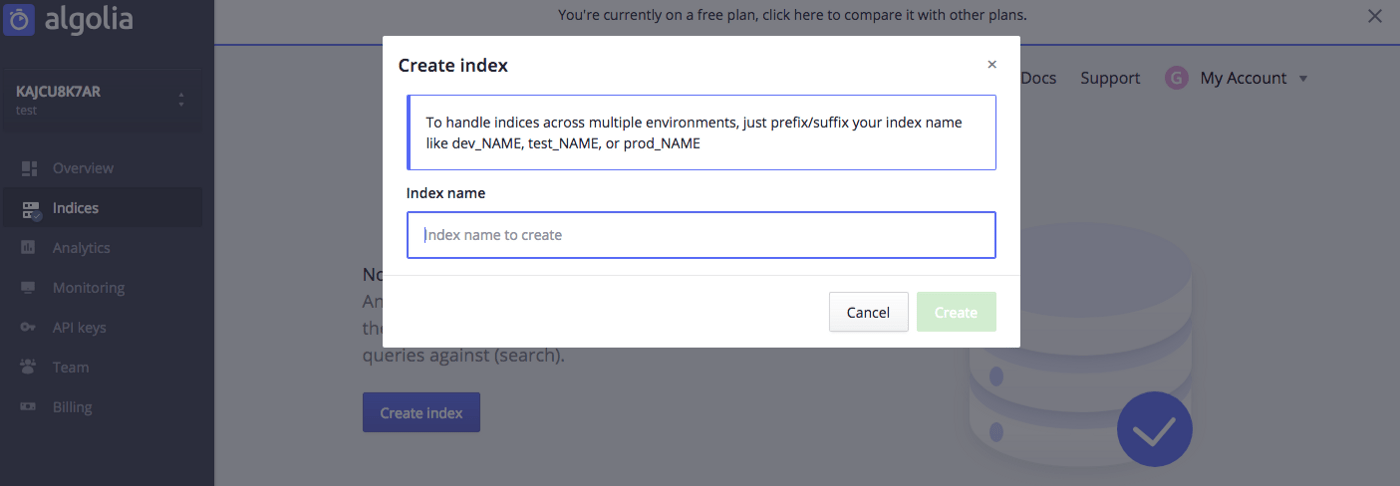
To create an index, click on Indices in the left-hand column of your dashboard and then click the Create index button. Enter a name for your index and then click the Create button.

Prepare Your Frontend
Algolia is ready for us to query, so let’s set up the web page where your users will perform searches.
4. Create your webpage
Download the example index.html file needed to create your search page. This is a very simple HTML file that uses the Algolia Javascript package and autocomplete.js together to create an auto-completing search bar.
<!DOCTYPE html>
<html>
  <head>
    <link rel="stylesheet" href="https://maxcdn.bootstrapcdn.com/bootstrap/3.3.5/css/bootstrap.min.css">
    <style>
      .algolia-autocomplete {
        width: 100%;
      }
      .algolia-autocomplete .aa-input, .algolia-autocomplete .aa-hint {
        width: 100%;
      }
      .algolia-autocomplete .aa-hint {
        color: #999;
      }
      .algolia-autocomplete .aa-dropdown-menu {
        width: 100%;
        background-color: #fff;
        border: 1px solid #999;
        border-top: none;
      }
      .algolia-autocomplete .aa-dropdown-menu .aa-suggestion {
        cursor: pointer;
        padding: 5px 4px;
      }
      .algolia-autocomplete .aa-dropdown-menu .aa-suggestion.aa-cursor {
        background-color: #B2D7FF;
      }
      .algolia-autocomplete .aa-dropdown-menu .aa-suggestion em {
        font-weight: bold;
        font-style: normal;
      }
    </style>
  </head>
  <body>
    <div class="container">
      <div class="row">
        <div class="col-sm-6 col-sm-offset-3">
          <form action="#" class="form">
            <h3>Algolia API Tutorial</h3>
            <input class="form-control" id="search-input" name="contacts" type="text" placeholder='Search for events...' />
          </form>
        </div>
      </div>
    </div>

    <script src="https://cdn.jsdelivr.net/algoliasearch/3/algoliasearch.min.js"></script>
    <script src="https://cdn.jsdelivr.net/autocomplete.js/0/autocomplete.min.js"></script>
    <script>
      var client = algoliasearch('YourApplicationID', 'YourAPIKey');
      var index = client.initIndex('your_index_name');
      autocomplete('#search-input', { hint: false }, [
        {
          source: autocomplete.sources.hits(index, { hitsPerPage: 5 }),
          displayKey: 'name',
          templates: {
            suggestion: function(suggestion) {
              return suggestion._highlightResult.name.value;
            }
          }
        }
      ]).on('autocomplete:selected', function(event, suggestion, dataset) {
        console.log(suggestion, dataset);
        alert('dataset: ' + dataset + ', ' + suggestion.name);
      });
    </script>
  </body>
</html>
The star of the show is “search-input” which will be used for our Algolia search. When our users type in the search bar, the Algolia back-end loads our results into “search-input”.
Then the index is fed into autocomplete.js to render the search suggestion.
When a search suggestion is selected, an alert is fired in the window informing the user of their selection. In practice, this would probably navigate to another page where search results are displayed.
5. Insert your API credentials and index name
Grab the API credentials from the API Keys section of your Algolia dashboard and insert them into the appropriate spots in the code (YourApplicationID and YourAPIKey). Make sure to use the Search-Only API Key from the Algolia website.
Then, insert the index name you created earlier into the appropriate spot in the code (your_index_name).
This tells the local application which Algolia application to use for our autocompleting search, and the API key authorizes the application so it can make calls against it.
Save the index.html file.
6. Testing it out
Open index.html in your favorite browser to see your search bar.
Alternatively, you can publish your page on the web with CodePen. Create a new pen and pasting in the contents of your index.html file.
The autocomplete won’t work just yet, as the Algolia index has not been populated with your data.


