We will be using Bootstrap 4 official documentation for this demo, which includes Bootstrap CSS, Bootstrap JS, and JQuery JS as well.

Step 1: List the Resources needed
Bootstrap Autocomplete works as a plugin. Add it to your page. We will need the below CSS files
<link href=”https://stackpath.bootstrapcdn.com/bootstrap/4.5.2/css/bootstrap.min.css” rel=”stylesheet”>
<link href=”https://code.jquery.com/ui/1.12.1/themes/base/jquery-ui.css” rel=”stylesheet”>
and jQuery js files
<script src=”https://code.jquery.com/jquery-3.5.1.min.js”></script>
<script src=”https://code.jquery.com/ui/1.12.1/jquery-ui.min.js”></script>
Step 2: Define UI
Minimal UI to start with can be:
<div class=”container mt-5″>
<div class=”col-md-6″>
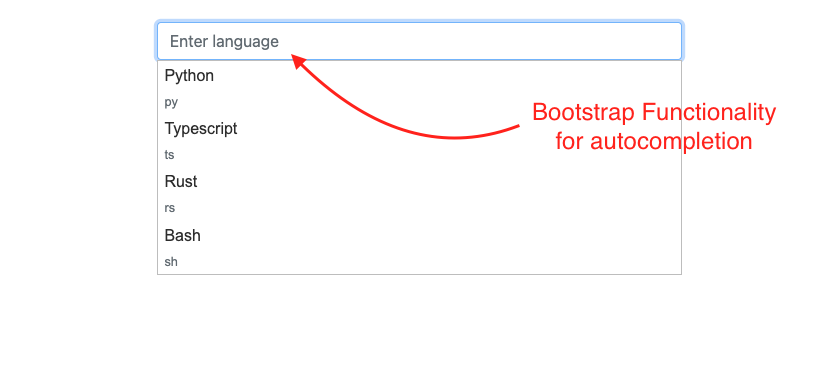
<input type=”text” class=”form-control” id=”language” name=”language” placeholder=”Enter language”>
</div>
</div>
Step 3: Define the source for the dropdown
var languages = [
{
language: ‘Python’, code: ‘py’
},
{
language: ‘Typescript’, code: ‘ts’
},
{
language: ‘Rust’, code: ‘rs’
},
{
language: ‘Bash’, code: ‘sh’
},
];
Step 4: Attach autocompletion function to input box
$(“#language”).autocomplete({
minLength: 0,
source: languages,
focus: function(event, ui) {
$(“#language”).val(ui.item.language);
return false;
},
select: function(event, ui) {
$(“#language”).val(ui.item.language);
return false;
},
}).autocomplete(“instance”)._renderItem = function(ul, item) {
return $(“<li>”)
.append(“<div>” + item.language + “<br><small class=’form-text text-muted’>” + item.code + “</small></div>”)
.appendTo(ul);
};$(“#language”).focus(function(){
$(this).autocomplete(“search”, $(this).val());
});
});
Output: