

Looking for a complete Shopify search guide? See our Shopify product search guide.
Shopify is a great eCommerce platform. But, unfortunately, the default search bar does not give much control. That’s why we’ll discuss how can we make a better Shopify search page.
Get Shopify Search Bar 14-day free trial
Customize the Shopify search page You can customize the Shopify search page by using the Expertrec smart search bar or by editing code in the liquid. If you are someone who is not familiar with Shopify code and wants the easiest and quick solution, then here we go:Manage the Shopify search page using the Expertrec search bar
You can get the Expertrec smart search bar in three ways as follows:Expertrec Shopify search app
The Expertrec smart search bar is listed on the Shopify app store. So, you can just go to the app store, search for the app and install it. Here’s how you can do it:- Click on the Expertrec smart search bar to install the Shopify search app.
- Click on add app -> install the app -> start a free trial.
- Once it is installed, make sure that the search extension is enabled. If not, then you can turn it on just by toggling it.
 There are two more methods to install the app. Let’s discuss both of them.
Expertrec Shopify search plugin
It is also a good and easy way to install the app. Here’s how you can do it:- Click on Expertrec Shopify Search Plugin.
- Now, you need to enter the URL of your Shopify store in the domain section.
- Click on the install button and log in to your Shopify store to install the app.
Expertrec Custom Search Engine
If you want to play around with the code, then try copying code from the Expertrec dashboard. Well, Expertrec already has the app listed in the Shopify App Store. Yet, if you want the other way, then here it is: i. Click on https://cse.expertrec.com and Sign in with your Google Account. ii. Now, you enter your website URL, and once done, go ahead to the dashboard. iii. Copy the code from the Expertrec dashboard, and don’t forget to copy the HTML tag as shown below: iv. Here’s a reminder. You have three options to add to the search bar.- HTML code
- Use existing Search Box
- CSS Selector
theme.liquid in order to add the Expertrec code.
x. Here, click on the Code section in the Install menu of the dashboard. Copy the code and the HTML tag.
<!--Shopify search analytics - Expertrec(.js - head)-->
<script>
  (function() {
    var id = 'Your_API_Key';
    var ci_search = document.createElement('script');
    ci_search.type = 'text/javascript';
    ci_search.async = true;
    ci_search.src = 'https://cse.expertrec.com/api/js/ci_common.js?id=' + id;
    var s = document.getElementsByTagName('script')[0];
    s.parentNode.insertBefore(ci_search, s);
  })();
</scrip>
<!-- Shopify search analytics - Expertrec(HTML tag - body)-->
<ci-search></ci-search>theme.liquidand the HTML tag in the <body> section just between the two <div>.
xi. If you are not using an existing search bar, then you would have copied the HTML tag.
xii. Save the code.
xiii. Click on that eye icon to preview your Shopify store. Here, you can see the Expertrec Search Box.
Try Demo
Click on the search bar and type a query as shown below: Expertrec search bar will appear with an in-build voice search. And, I know you already know the sudden growth of voice technology. After all, installing the Expertrec search bar will ensure that the website visitors don’t have to strain their fingers to type the product when they can spell and get the listing.

FAQ
How do I add, edit, and publish a page in Shopify? While creating a Shopify online store, you will get a lot of features. One of them is that you can create web pages in your Shopify admin panel. What we mean by web pages is that they contain information that rarely change or that will be made for customer reference. For example. About Us page or a Contact Us page is one of the web pages that you can create for your Shopify online store. You can also add a blog to your online store that will need regular updates. For example, you may be publishing the new blog posts or you are required to update the existing blog posts be it any image, or meta description. You can also try to add a webpage in order to encourage feedback. You can also enable comments to know what your blog readers are expecting. Adding a new page to your Shopify online store To add a new web page to your Shopify online store, you need to follow these steps:-
- In the Shopify admin panel, click Online store -> Pages -> Add page.
- Now, you need to enter the title and content for the web page. Keep in mind that you should be descriptive and clear whenever it comes to the title of the web page. The title of the web page is displayed in the tab or title bar of the browsers. It also appears as the page title in search engine results. You can learn more about the SEO of a website to create an SEO optimized blog page.
- Whichever page you want to publish, select it under Visibility. Note that by default your new web page will be visible whenever you click on the Save button. If you want to hide a new or existing web page from the Shopify online store, you can do it by selecting the Hidden option. You can also control the date when your webpage should be published. For this, set a specific publish date and your web page will be published on that date.
- In the end, click Save.
- This is completely optional, but if you want to make a published web page appear in the navigation of your online store, then you can add a link to it in the menu.
- Enter the text to transform it into a link in the Content field. Now, highlight the link text and click on the Insert link button.
- In that space, enter the web address in the Link to the field. You can enter a descriptive Link title that will help with web accessibility and search engine optimization.
- Click on the Save button.
- Open Google Maps, and enter the address that you want to show on the map.
- Click on the Share icon in order to open the sharing options. Here, click on Embed map in order to create your embed code.
- You can choose the size of the map according to your requirements. You need to copy the code in the text box. That code begins with
<iframe src=and it is a tag written in HTML that embeds the Google map. - Now, go to the Shopify admin panel and click Online store -> Pages.
- Here, you need to click on the title of the web page where you are supposed to display the map. In the Content toolbar, you need to click on the Show HTML button to see the HTML code of your web page.
- Now, paste the code that you recently copied from the Google maps into the Content box. You can embed the Google map at the bottom of your web page by pasting the code after any existing content or at any place on your web page. You need to click on the Show Editor to switch back to the webpage editor from the HTML viewer so that you can preview your map.
- Click on the Save button.
- Open Shopify admin panel and click on Online store -> Pages.
- Click on the title of the web page and make changes to the existing web page content or the existing settings.
- Click Save. You can visit the web page in your Shopify store to ensure that the changes are appearing. You may have to reload the browser to view the recently saved changes.
- Go to Shopify admin panel, Online store -> Pages.
- Click on the title of the web page that is supposed to be deleted.
- Click on Delete page -> Delete.
- Open Shopify admin panel, click on Online store -> Pages.
- Now, select or mark check on every box next to each web page that you want to publish.
- Click on the Actions in the drop-down menu, and then select Publish selected pages. So now, you should be able to see your web page as it is published on your Shopify store.
- Go to Shopify admin panel, click on Online store -> Pages.
- As we did while publishing the web pages, you need to check the box next to each web page that you want to unpublish from your Shopify store.
- Click on Actions in the drop-down menu, then click on Unpublish selected pages.
theme.liquid -> <body>, copy the code between the two <div> as shown below:
vii. You have added the Google CSE right away.
Open your website, and it would show something like “powered by Google.”
Get Shopify Search Bar @ $9/month
You can customize the Shopify search page by editing the search.liquid template in your theme, using the Shopify Theme Editor for visual changes, or installing a search app like ExpertRec that provides a fully customizable search results page with filters and sorting.
This usually happens when product tags and descriptions don’t match what customers are searching for. Ensure your products have descriptive titles, relevant tags, and detailed descriptions. A search app with typo tolerance can also help catch misspelled queries.
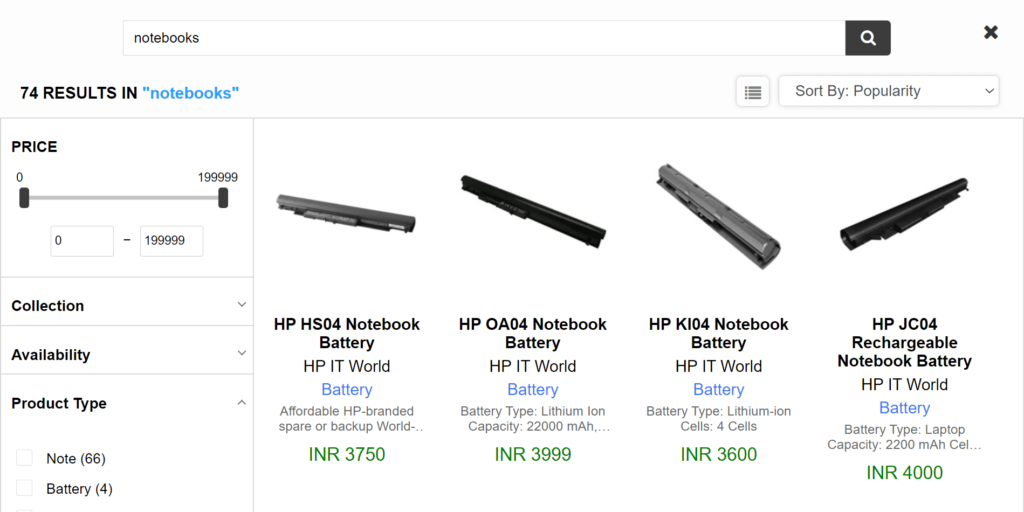
Yes. You can add filters using Shopify’s Search and Discovery app for basic filtering, or use a third-party app like ExpertRec for advanced faceted filters by price, category, brand, availability, and custom attributes.


